Getting Started
Welcome to Mercurie. This guide walks you from zero account to a working dashboard in about three minutes.
Step 1 — Create an account
If you don't have a Mercurie tenant yet, follow Sign Up first. You can sign up with Google (one click) or with email and password plus a 6-digit verification code. Either way, you'll finish a short business profile (name, country, category, phone) so Mercurie can issue valid invoices and run KYC.
Already have an account? Skip to step 2.
Step 2 — Sign in
Go to mercurie.ng/app/login and use the same method you signed up with — Continue with Google or email + password. Full guide: Sign In. Forgotten the password? See Reset Password.
Step 3 — Tour the dashboard
After you sign in you land on your dashboard — your control centre for every software subscription your business pays for.
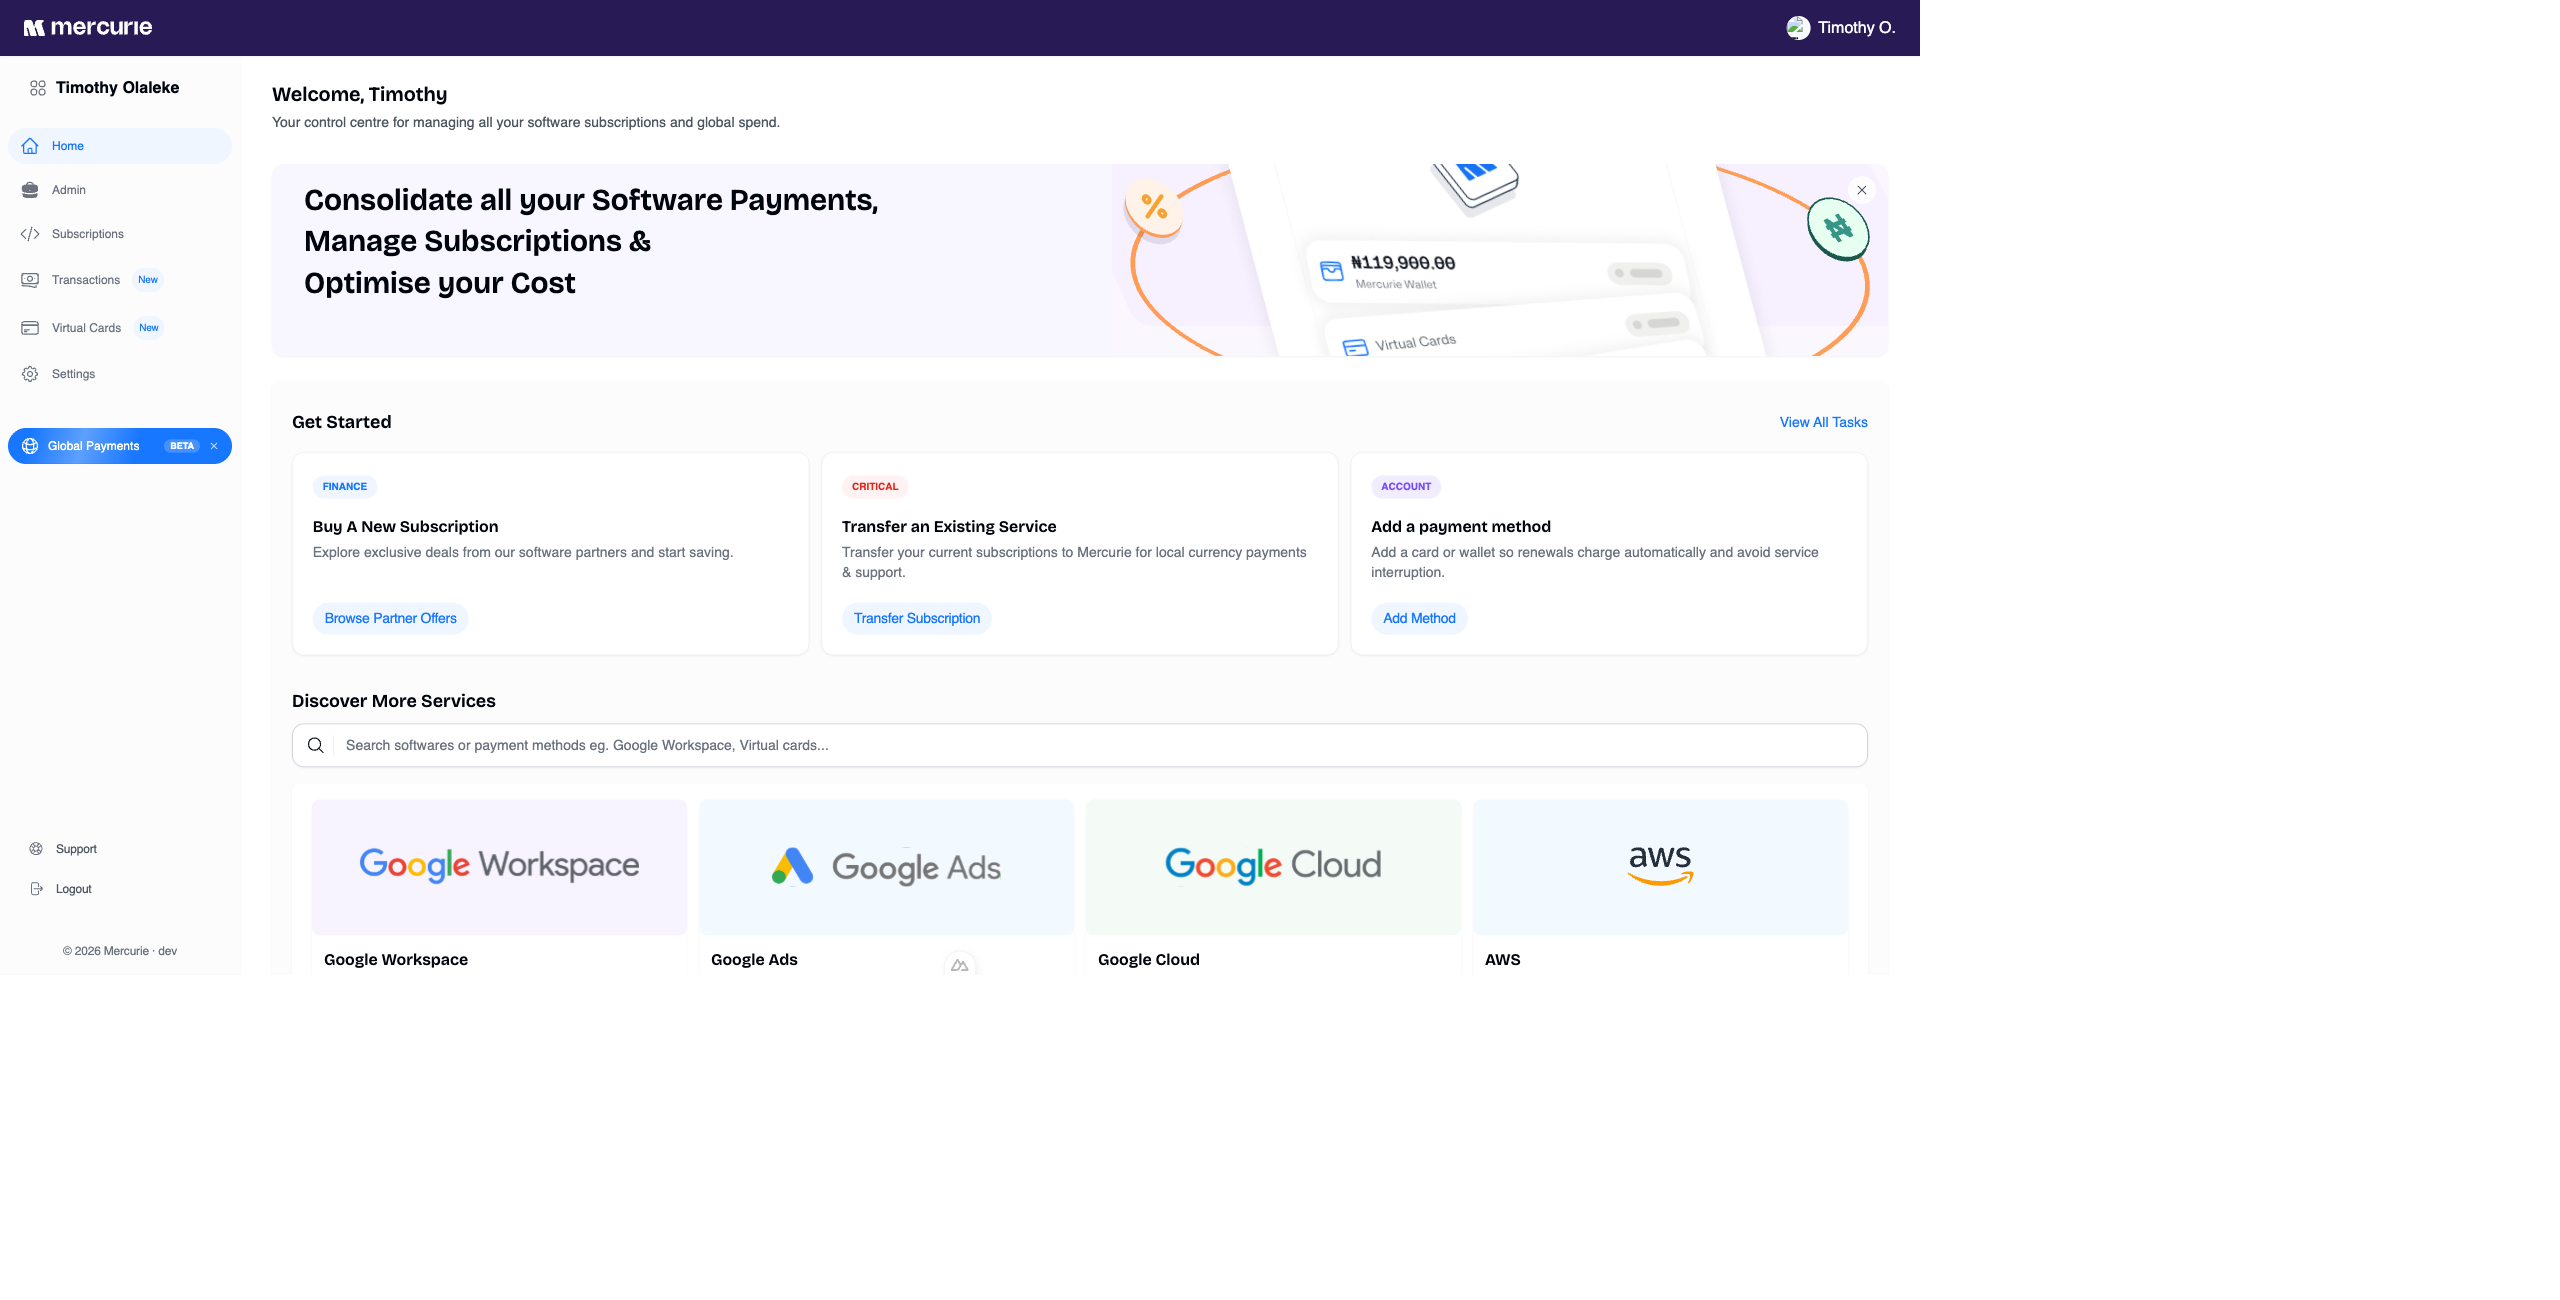
What you can see at a glance
- Hero card — your consolidated NGN spend across every active subscription.
- Sidebar — quick navigation to Subscriptions, Transactions, Virtual Cards, Global Payments, and Settings.
- Get Started row — three action cards for the most common first-week tasks.
- Discover More Services — searchable catalogue of every partner you can buy through Mercurie.
Step 4 — The three things to do first
- Buy a new subscription. If you don't already pay Google or AWS in USD, the fastest path is to browse partner offers and start a fresh plan in Naira.
- Transfer an existing service. Already paying Google Workspace in USD on your own card? Transfer it to Mercurie and stop absorbing FX swings yourself.
- Add a payment method. Subscriptions only auto-renew if there's a card or wallet on file. Add a payment method before your first renewal date.
Need help?
The Support entry in the left sidebar opens a ticket with the Mercurie ops team. Most billing and provisioning questions are answered same-day.